![memtime-light-2x.png.png]](https://knowledgebase.memtime.com/hs-fs/hubfs/memtime-light-2x.png.png?height=40&name=memtime-light-2x.png.png)
Before You Begin
Before configuring Microsoft Entra ID, ensure that:
-
Your account is on a Premium plan.
-
You have account admin permissions in Memtime.
-
You have administrator access to Microsoft Entra ID.
-
You can create and configure enterprise applications in Microsoft Entra ID.
Step 1: Add Microsoft Entra ID in Memtime
- Open the Customer Portal.
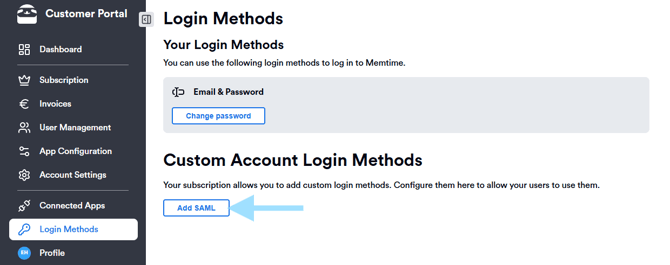
- Go to Login Methods, then click Add SAML.
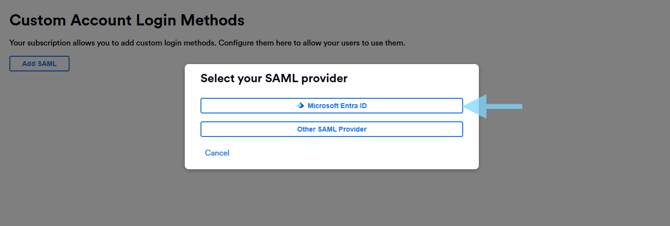
- Select Microsoft Entra ID.
A configuration window will open.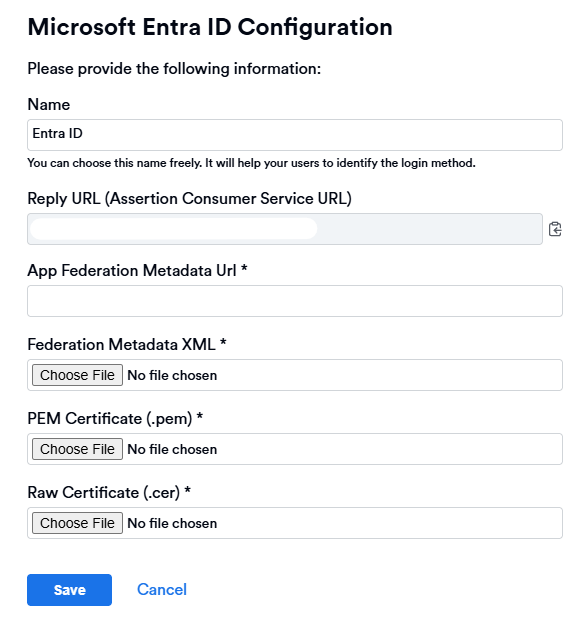
All fields in this configuration window are required.
Step 2: Create an Enterprise Application in Microsoft Entra ID
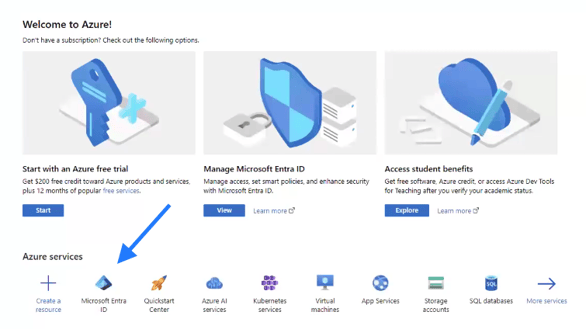
- Sign in to Microsoft Azure, and open Microsoft Entra ID.
- In the Overview page, click Add → Enterprise application.
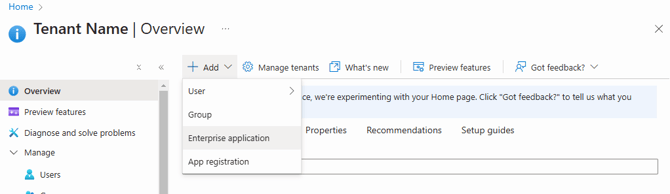
- Click Create your own application.
- Select Integrate any other application you don't find in the gallery (Non-Gallery).
- Enter a name for the application, for example Memtime.
- Click Create.
.png?width=670&height=588&name=image%20(2).png)
Step 3: Configure Single Sign-On
- Open the application you created.
- Select Set up single sign-on.
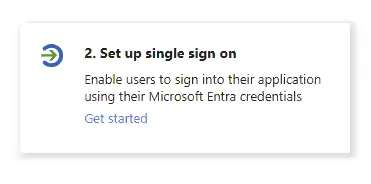 Choose SAML.
Step 4: Configure the Basic SAML Settings
At this point, you’ll need to complete the first section in Azure AD setup, Basic SAML Configuration.
Configure the Identifier (Entity ID)
-
In the Basic SAML Configuration section, click Edit.
-
To find your Tenant ID:
-
Open Microsoft Entra ID (use the search bar if you don't see it right away).
-
In the Overview page, locate Tenant ID under Basic information.
-
-
Alternatively:
-
Open Properties.
-
Copy the Tenant ID.
-
- Click the Copy to clipboard icon next to the Tenant ID.
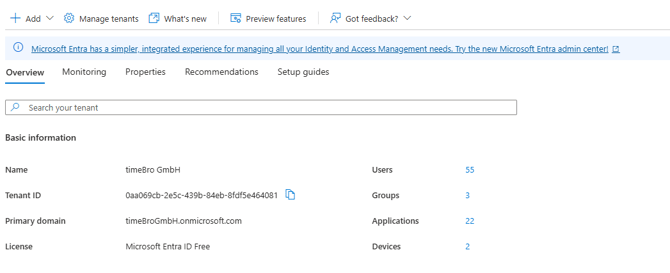
- Create the Identifier (Entity ID) using the following format:
https://sts.windows.net/<TenantID>/
📌 Replace <TenantID> with your Tenant ID. - ⚠️ The Tenant ID should always end with a "/".
Example:
https://sts.windows.net/12345678-1234-1234-1234-123456789012/ - Paste your Tenant ID value into the Identifier (Entity ID) field in the Basic SAML Configuration section.
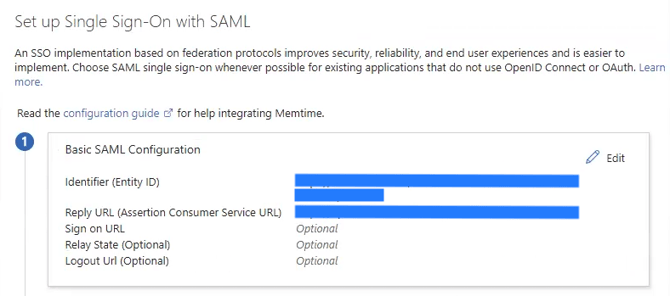
- Then, go back to Memtime's Customer Portal, and copy the Reply URL displayed in the Memtime configuration window.
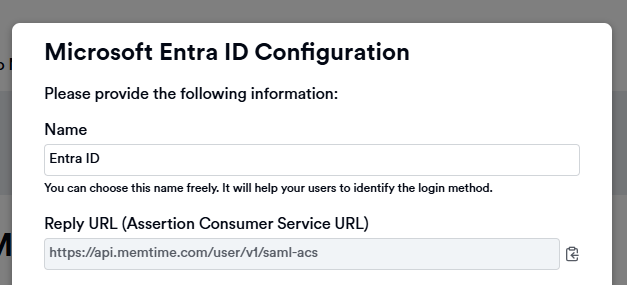
And paste the Reply URL provided in Memtime's Customer Portal intothe Add Reply URL option.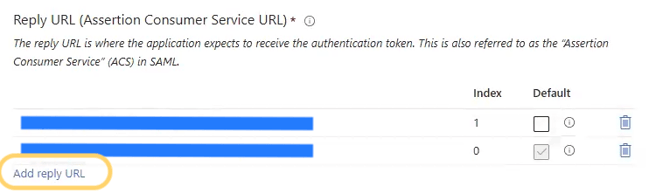
Step 5: Collect the Required Configuration Values
In Microsoft Entra ID, open:
Enterprise Applications → Your Memtime Application → Single Sign-On (SAML)
In the SAML Certificates section, locate:
- App Federation Metadata URL (Copy Option)
- Federation Metadata XML (Download Option)
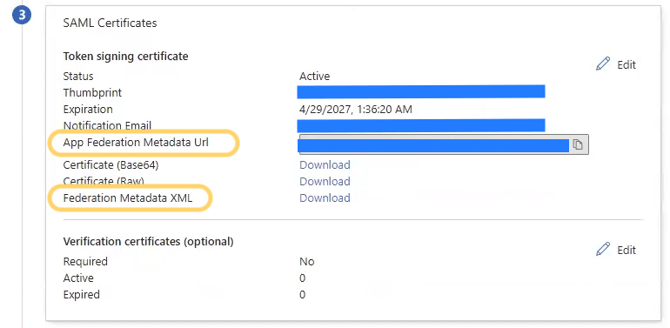
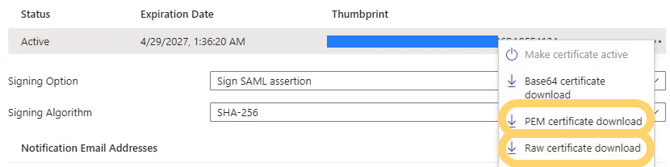
To obtain the PEM and RAW certificates:
- Click Edit in the SAML Certificates section.
- Click the three-dot menu.
- Download:
- PEM Certificate
- Raw Certificate
Step 6: Complete the Configuration in Memtime
Return to the Memtime configuration window and enter all required values:
- App Federation Metadata URL
- Federation Metadata XML
- PEM Certificate
- Raw Certificate
- Any other required fields shown in the configuration window
-1.png?width=474&height=505&name=image%20(2)-1.png)
Click Save.
After saving, Microsoft Entra ID will appear in your list of available login methods.
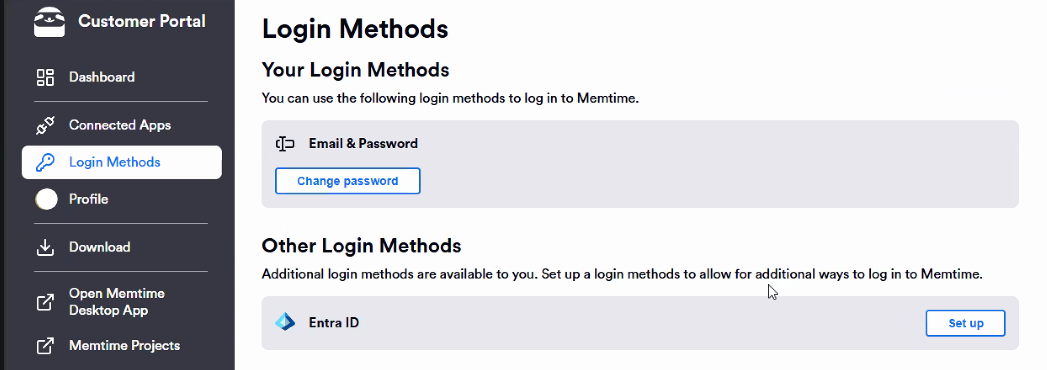
Step 7: Activate the Login Method (Step for Users)
- In the Customer Portal, go to Login Methods.
- Locate Microsoft Entra ID.
- Click Set up.
A Microsoft sign-in window will open.
- Sign in using your Microsoft account.
- Complete any additional authentication steps.
Once authentication succeeds, Microsoft Entra ID will be added to your active login methods.
Verify User Attributes (Step for Admins)
Microsoft Entra ID sends user information through SAML claims during authentication.
When configuring your application, ensure that the default attributes and claims provided by Microsoft Entra ID remain available and unchanged.
You can verify this in:
Single Sign-On (SAML) → Attributes & Claims
If required attributes are removed or modified, users may not be able to authenticate successfully.
Expected Result
After the setup is completed successfully:
- Microsoft Entra ID appears in the list of active login methods in the Customer Portal.
- Users can activate MIcrosoft Entra ID as their Login Method in the Customer Portal.
- Users can select Microsoft Entra ID on the login screen.
- Users are redirected to Microsoft for authentication.
- After successful authentication, users are automatically signed in to Memtime.