- This option is available in the Premium plan only. If you have Basic or Connect, you can upgrade your plan in the Customer Portal with this article here.
- This option can only be configured by the Memtime account admin. Setup depends on the chosen login method, but users will always sign in via a redirect.
How to set up SAML Based Login Methods
For all these methods, the first step is to go to:
Customer Portal → Login Methods → Add SAML

From here, the procedure will be different depending on the identity provider selected.
How to set up Google as Login Method
1. First, select the Google option in Customer Portal → Account Settings:

2. Once Google has been enabled, it will be displayed as an available option in Customer Portal → Login Methods:

3. Clicking the "Set up" button will open a pop-up window prompting the user to either enter an e-mail address and password, or to select an existing Google account:


4. When the desired option has been selected, the pop-up window will close by itself and the Login Method will be added to the list of "Active Login Methods" in the Customer Portal → Login Methods:

From this moment on, this method can be used by the user to log in.
Entra ID
You can find a dedicated knowledge base article with detailed setup instructions here:
🔗 Set Up Microsoft Entra ID as a Login Method
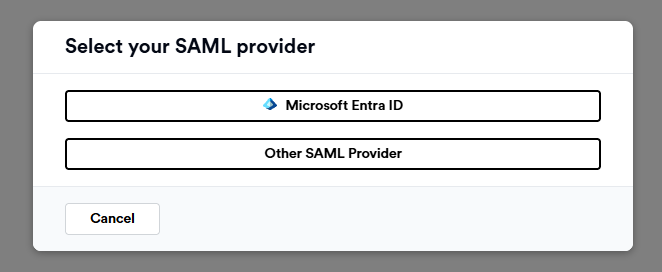
Other SAML Providers
To add other SAML Providers as additional login methods, the process is usually easier, as less information is required. To enable them, the admin must access Customer Portal → Login Methods → Add SAML → Other SAML Provider:

Okta
A good example is Okta. In its case, only the App Federation Metadata URL, and the Federation Metadata XML are required:
-2.png?width=451&height=480&name=image%20(2)-2.png)
To find them, the user must go to Okta → Applications → Sign On → Metadata URL.

This URL should be pasted as App Federation Metadata URL.
To obtain the XML, you must go to the link, save the Metadata and then upload it as Federation Metadata XML.
Once all fields have been completed in the Memtime pop-up, the information can be saved by clicking on "Save". The user will then be able to click on "Set up" and another pop-up window will ask for the credentials, giving the user the option to request either a user or enter an email address and password.
Auth0
On the other hand, Auth0 is usually the simplest method to configure, as it only requires the Reply URL.
To connect this method, follow the steps described above (i.e. Customer Portal → Login Methods → Add SAML → Other SAML Provider). Here, you can copy the Reply URL, and once you have it:
- Log in to Auth0 Dashboard.
- Go to Applications and select your application. In case you have not created it yet, you can do it now.
- Scroll to "Application URLs" and find "Allowed Callback URLs."
- Add your Reply URL(s) in this field.
- Click "Save Changes."
Once this is done, you can go back to the Memtime Customer Portal and you will find Auth0 as Login Method. Click on "Set up" to enter your credentials, and you are ready to use it!
Other SAML Providers
To add other SAML Providers, you will also be prompted for the Reply URL. If you have problems adding them as additional login methods, please reach out to our support team.
Whichever Login Method you have chosen to add, you can enable or disable it from Customer Portal → Account Settings:

Depending on the options that have been selected, the user will see one or the other at the time of Login.
