This integration is designed specifically for Xero Projects. If you try to authenticate any other type of Xero account, you will not be able to import entities or export time entries.
To help you get the most out of this integration, the following diagram illustrates how data gets synchronized between Memtime and Xero Projects:

Step 1: Install Xero Projects as a Connected App
You need to be an account admin in Memtime and Xero Projects to install this integration. If you're not, you should first check Step 2 below.
1. Launch the Memtime App and navigate to the menu icon. Select Connected Apps.
2. If Xero Projects is not listed, click Find More Connected Apps.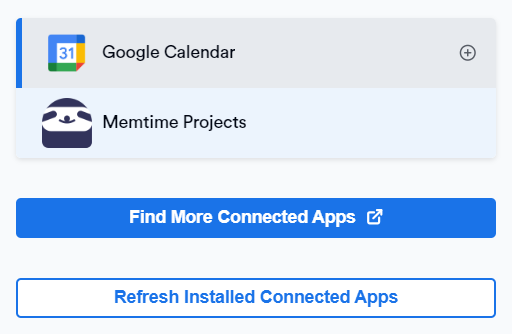
3. The Memtime Marketplace website will open in your browser. Search for Xero Projects in the search bar, or any other Connected App you’d like to try.
Once you find Xero Projects, click Connect with Xero Projects.

4. You'll see a message that only Memtime account admins can install it. If you’re also an admin in Xero Projects, click Continue.

Step 2: If You Are Not a Xero Projects Admin
1. If you are not an administrator in Xero Projects, you will need to add your administrator to the Memtime account.
This way, they can install the Connected App for you, and approve the request in Xero Projects so you can connect it to Memtime.

2. To do this, go to the Customer Portal → User Management tab.
Click Invite new users and invite your admin with Account Admin permission.
3. Once the admin accepts the invitation, and they install Xero Projects in your Memtime account like in Step 1 of this article, you can return to your Memtime app.
Step 3: Authenticate Xero Projects
1. Open Memtime, and go to Menu → Connected Apps, and click Refresh Installed Connected Apps to see Xero Projects listed as a Connected App.
2. Select Xero Projects from the Connected Apps list and click Authenticate.
You will also be automatically prompted to authenticate.

3. A new window will open. Enter your email to receive a validation code.

4. Once you receive the code, go back to Memtime to submit it to authenticate.

5. After authentication, you can select Xero Projects from the Connected Apps menu to access its settings.
Here, you can customize the settings to match your preferences.

Step 4: Create Xero Projects Time Entries in Memtime
1. Open the Project Management tab in Memtime. Click on the Refresh button to ensure all your projects are imported.
2. Go to the Time Tracking tab and create time entries by clicking and dragging in the Time Entries column.
The Time Entry window will now offer you the option to select Xero Projects as a Connected App.
3. Log in to your Xero Projects account and go to your Projects → Time Entries, or any task with time entries to view the time entries synced from Memtime.
Automatic Synchronization:
Memtime automatically exports time entries created in Memtime to Xero Projects. Similarly, any time entries created directly in Xero Projects are exported to Memtime by default.