How to delete Captured Activities (macOS)
You can delete the Captured Activities tracked in your Memory Aid individually, or all together.
Memtime keeps track of all the activities that happen within your device, and displays them in your Memory Aid, specifically in the Captured Activities section.
Captured Activities are locally stored in your device, which means that no one but you can have access to them. At the same time, you have multiple options to delete them:
- Individual deletion of Captured Activities
- Deletion of daily Captured Activities
- Bulk deletion of Captured Activities
- Complete reset of your Memtime app
Before looking at the different methods for deleting captured activities, it is important to note that deleting activities cannot be undone.
Individual deletion of Captured Activities
No matter which zoom option you have set, Memtime will still track all your activities. The system will show, as the main activity of a block of time, the most prevalent one.

When you right-click a time block and select "Delete", Memtime will erase it completely from your Memory Aid. That is, not only the most prevalent recorded activity, but also all those that follow it in that block of time will be deleted, leaving a blank space:

As the captured activities will be displayed differently depending on the zoom setting, we recommend that you take this into account before deleting activities.
So, if you want to delete only one of the recorded activities, you can change the zoom setting to a lower one, select only the activity you want to delete, and then return to your usual settings.
You can also make a multiple selection by using Command + left-click the Captured Activities you want to delete. Then, you can right-click on any of the selected activities and delete all selected items.

When all the activities in a block of time are individually deleted, Memtime will show a blank slot.
Deletion of daily Captured Activities
To perform this action, you must open your Memory Aid on the day in question, whose captured activities you want to delete, select the trash can icon and then confirm the deletion:

Keep in mind that deleting all captured activities for a certain day will also prevent new captured activities to be shown if tracked later on the dame day.
Bulk deletion of Captured Activities
You can also opt to do a bulk deletion of your Captured Activities. It is important to be aware that this procedure will erase all the Captured Activities that your Memtime app has ever tracked, so please handle this option with care.
To bulk delete your Captured Activities, open the Menu in your Memtime app, and select "Preferences":

Scroll down until you find the section called "Delete all captured activities":

After clicking on the "Delete all captured activities" button, you will have to confirm the action by clicking once more on the "Delete" button:

After this, all your captured activities tracked to the date will be erased.
Complete reset of your Memtime app
Last, If you want to proceed with a complete reset of your Memtime app, that will include the deletion of your Captured Activities, as well as Time Entries and user settings, you can completely delete your Memtime folder.
To do it, please follow carefully the next steps:
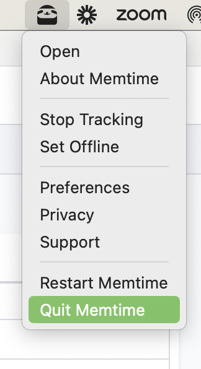
- Quit Memtime completely by clicking on the small Memtime icon in the app bar (right-click on the Memtime icon, then select "Quit Memtime").

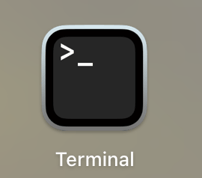
- In order to get to the folder containing the databases, open your Terminal:

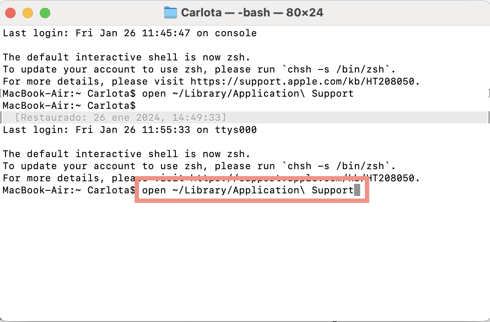
There, paste open ~/Library/Application\ Support and then click on the Enter key.
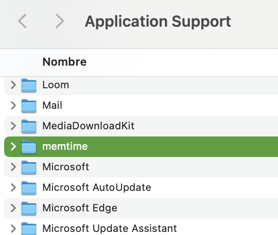
- The Application Support will open, and there you will be able to find a folder called memtime. You can completely delete this folder.

After doing so, you can run your Memtime app again to go through a fresh configuration process.
Please, be aware that the data deletion caused by the previous process is irreversible. For this reason, we recommend you to make a backup copy of your data, just in case you need it. If you want to learn more about how to make a backup copy of your data, click here.
In the following video, you will find a step-by-step guide of the mentioned options: