To create projects as shown in this article, make sure Memtime Projects is installed under Connected Apps. You can follow this guide if needed.
Note: This article only applies to Memtime Projects. If you use another project management integration, settings may differ.
Creating a new project in Memtime
In order to create a new project, you can go to the "Project Management" tab in Memtime and click on the plus symbol.

By clicking on the plus symbol, you will see an option to create a new customer or a new project.
By default, the project structure is set to Customer > Project, which means that you can group different projects under the same customer.
Customizing Project Structure
Before creating new projects and customers, you can choose your preferred project structure. You can also skip this step and use the default one.
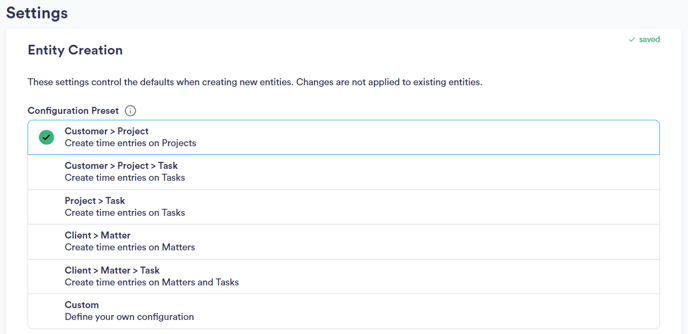
Memtime gives you the option to choose from multiple configuration presets or create your own custom preset.
The default Project structure in Memtime is set to Customer > Project.
To change or personalize the project structure, you can follow these steps:
1. Navigate to the "Project Management" tab in Memtime.2. If you have other Connected Apps shown on the left menu, select "Memtime Projects".
3. Click on the settings icon for "Memtime Projects".
4. Choose the preferred project structure.
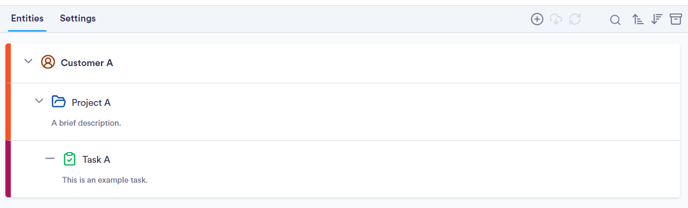
As an example, this is how the Customer > Project > Task configuration preset will appear once you have created a few examples for each category.
Adding New Projects, Customers and Tasks
After you choose the preferred project structure, you can start adding new projects and customers.
To add a new customer, project, task or matter you can click on the plus button and select one of the options you have.
When creating a new project, a popup window will open where you can fill in the following information:
- Project Name: Provide a name for the project.
- Choose where to categorize your new project: You have the option to decide if your new project should be placed under an existing customer, project, or matter, or if it should stand alone.
- Description: Add a brief description of the project.
- Project Color: Choose a color for time entries associated with this project.
- Preselected Activity Type: You can specify whether entries for this project will automatically be categorized as the preselected activity type, such as time of absence, etc.
- Billable Status: Choose if the project is billable or non-billable by default, or if it depends on the activity.
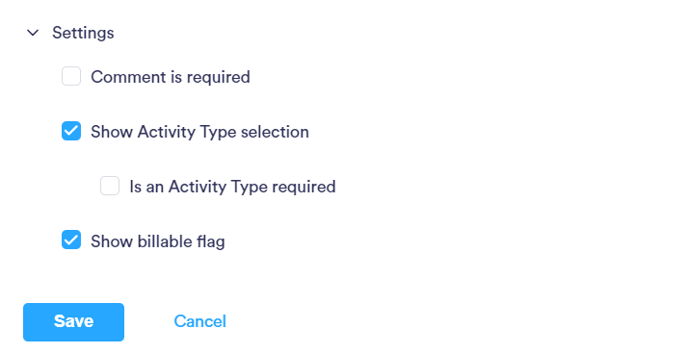
Memtime also gives you the option to set additional preferences for each new project, such as:
- Specify whether a comment is mandatory for time entries in this project.
- Specify if an Activity Type is necessary for creating a time entry for this project.
- Specify if the billable flag should be displayed when creating time entries.
After setting up your new project, you can start booking time entries to it.
Adding New Projects from the Time Entry Window
Projects can also be created while creating a time entry. This is usually helpful in case you wanted to book time on something, but you forgot to create the right project or customer for this time entry.
Here's how you can proceed in that case:
1. When adding a new time entry, user the "Create" button on the right side, next to the "Assign to" dropdown menu.
2. Click on this button to instantly create a new task, project, or matter directly within the time entry window.
That's it! You can now create and customize projects that align ideally with your workflow. Here's a video that shows this complete process: