![memtime-light-2x.png.png]](https://knowledgebase.memtime.com/hs-fs/hubfs/memtime-light-2x.png.png?height=40&name=memtime-light-2x.png.png)
The DATEV EO Comfort integration is available only on the Memtime Premium plan.
Own Terminal Server setup: You can find all the instructions 🔗 here.
DATEV EO Classic users: You can find the relevant instructions 🔗 here.
If you have DATEVasp, you can forward this article to your IT Support, so they can assist you with the setup of Memtime.
Create a Memtime account (step for Memtime Admins)
1. Open our website:
🔗 https://login.memtime.com/sign-up
2. Create an account.
During registration, you will be asked if you want to add a Connected App.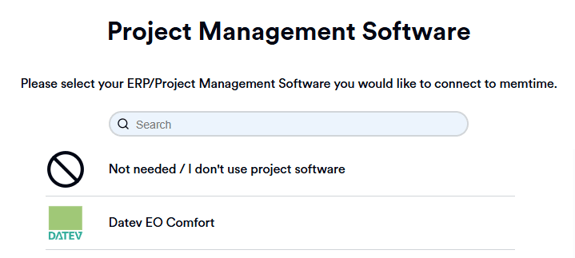
3. You will be asked to enter your DATEV Connect URL.
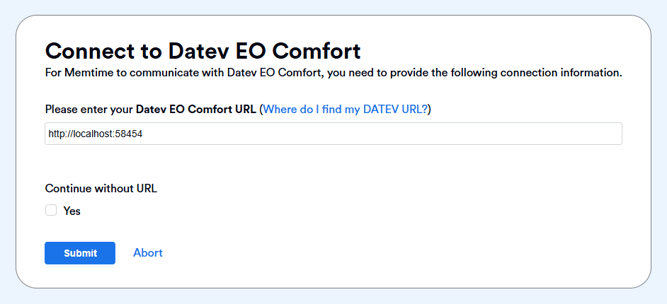
4. The DATEV Connect URL is required to connect Memtime with DATEV EO Comfort.
If you use the DATEV Connect interface via a DATEVasp server, the URL is always the same:
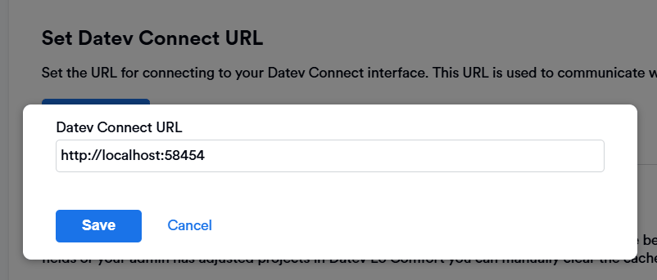
http://localhost:58454
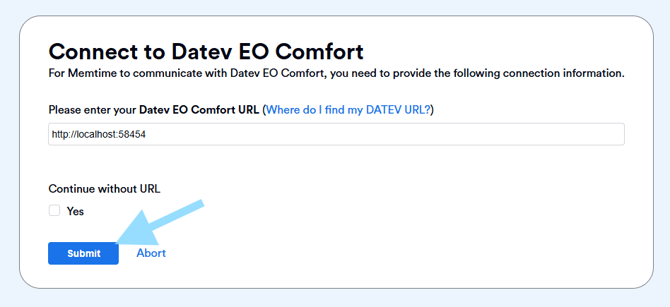
5. Enter the URL and click on Submit.
Entering the URL in the Customer Portal (step for Memtime Admins)
You can enter the URL in the Customer Portal using the following steps:
-
Log in to the portal: 🔗 https://portal.memtime.com/
-
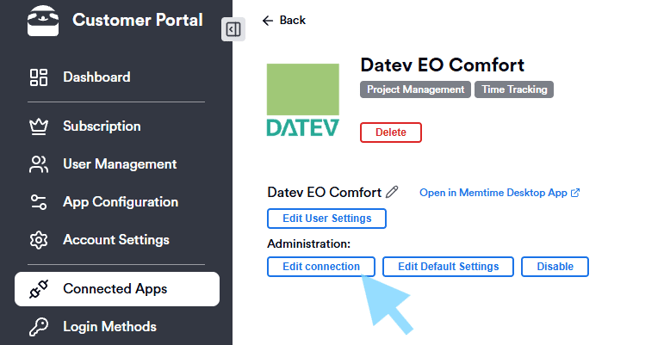
Go to the Connected Apps section.
-
Click Manage for DATEV EO Comfort.
-
Click Edit connection and enter the URL.
Entering the URL in the Memtime app (step for Memtime Admins)
The URL can also be entered directly in the installed Memtime app using the following steps:
-
Open the Memtime app.
-
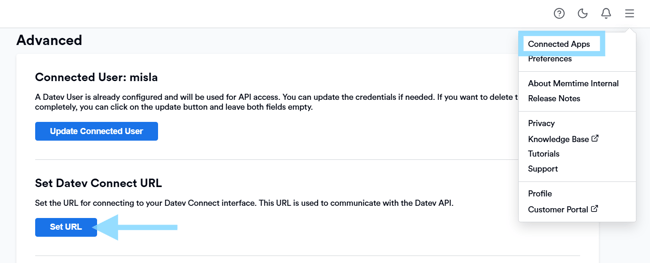
Click on the Menu icon (☰) → Connected Apps.
-
Scroll down in the DATEV EO Comfort settings and click on the Set URL option.
DATEV API Connection check (mandatory step for IT Support)
Before continuing with the setup, please make sure to do a DATEV API connection check.
Using the following guide, your IT team can test whether the DATEV Connect interface is reachable. This helps avoid connection issues early on:
📢 Please always complete this step or pass it on to your IT team before continuing with the setup.
Installing Memtime (step for IT Support)
In DATEVasp environments, an approval request often needs to be submitted to DATEV before Memtime can be installed.
More information and the request form can be found here:
🔗 DATEV Help: DATEVasp service portal: Connect third-party solution
Relevant section: 3.3 "Checking and connecting third-party solutions".
Managing Memtime App Updates
📢 Please review this article after installing Memtime to ensure that no update requests interfere with the user experience in the future.
Servers with roaming profiles and special settings
If you use servers with roaming profiles, please make sure that you have Memtime 4.12.+ installed.
Firewalls, proxy servers, etc. can sometimes block the connection between Memtime and DATEV EO Comfort, while Windows Group policies can block Memtime's automatic tracking.
In this case, please review the following articles:
🔗 Settings for Firewalls, Proxy Servers etc.
🔗 Memtime is not tracking (blocked by Windows group policy)
Starting Memtime and authenticating the Service User
1. Open Memtime on the server environment where it was installed, and go through the app setup process.
2. To get the most out of Memtime with DATEV in a team setting, we recommend authenticating a Service User in Memtime for API access. Navigate to:
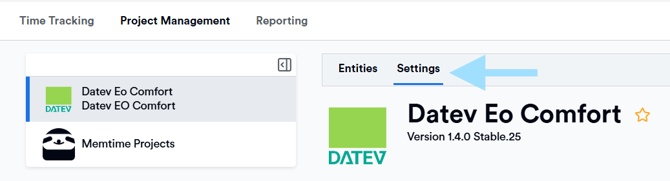
Memtime app → Project management → DATEV EO Comfort → Settings
3. Scroll down to Advanced actions and enter the service user's login credentials there.

This step only needs to be performed once and will then apply to all users within the same Memtime account.
Only a Memtime admin user can perform this step. Users with app access only cannot view or configure these settings.
How to find the credentials for the Service User
Recommended Option
We recommend using the credentials of an existing user with Main Admin rights in DATEV.
To enter the credentials in your Memtime app, please contact the user in your team who has these permissions in DATEV and ask them to authenticate as the Service User.
Please try the recommended authentication option for the Service User first before considering the next option.
Alternative Option
If you don't have a Main Admin user in DATEV at all, or if you'd still like to create a completely new DATEV Service User, you can follow these instructions:
🔗Set up a service user for Memtime
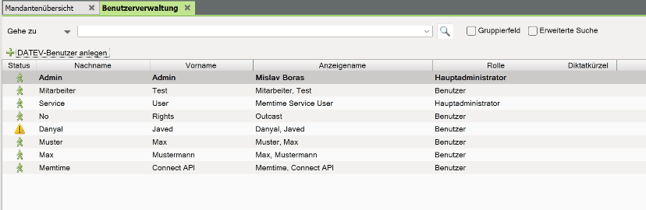
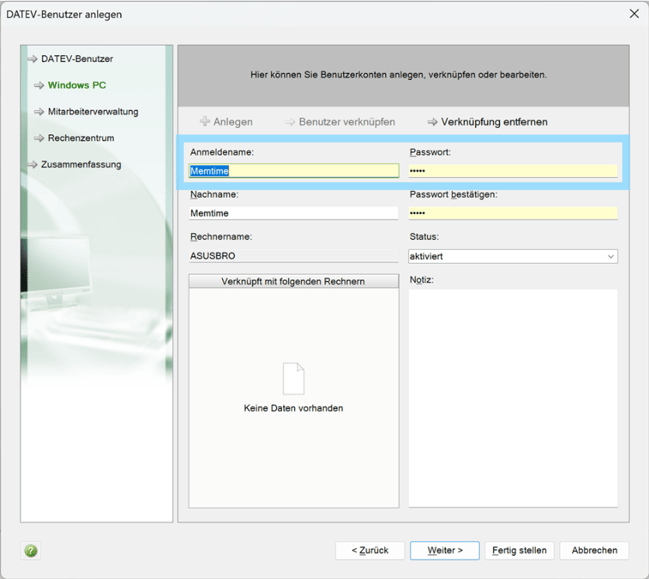
If your IT team has already created a new Service User for the Memtime app, the DATEV Service User username and password will be visible under:
DATEV → User Management → Service User → Windows PC
Authentication with DATEV in Memtime (step for all Memtime users)
All users must complete this step in their own Memtime app.
1. In Memtime, navigate to:
Memtime App → Project Management → DATEV EO Comfort → Settings
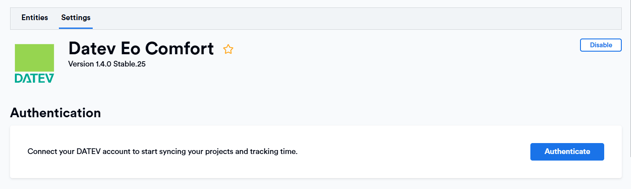
2. Click on Authenticate and log in with your DATEV server credentials.
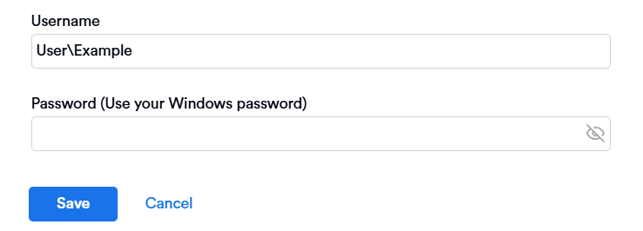
3. Memtime is designed to automatically fill in the username for you.
Enter your password and click on Save.
4. Once you have successfully authenticated, your DATEV clients will be automatically imported into Memtime.
You can then record times for your clients directly in the Time Tracking tab or check the current import settings for the DATEV EO Comfort integration in the Settings section.
Inviting other users to your Memtime account (optional)
After connecting your Memtime account to the DATEV EO Comfort integration, you can invite other team members to your Memtime account so they can test or use Memtime with you.
This step is optional. If you want to invite additional users, you can follow this guide:
🔗 How can I invite new users to my account?
Once invited, invited users can start using Memtime once it's installed by your IT team. However, you can come back to this step later at any time.
Support
Need help with the article or have any questions? Reach out to us anytime at:
For more troubleshooting information, please see our article: